
Sauces & Condiments
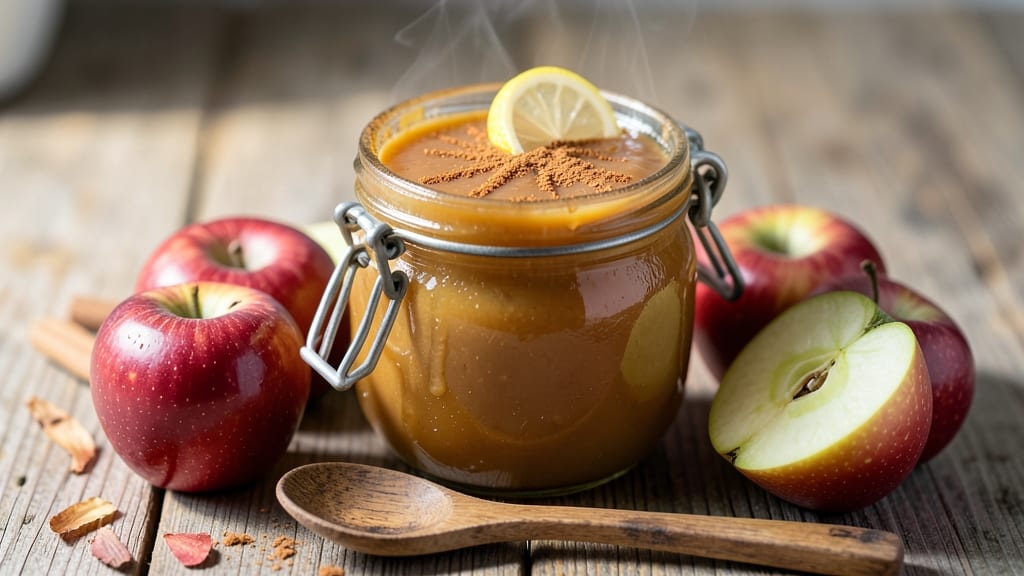
This bottled apple sauce recipe transforms seasonal fruit into a smooth, spiced preserve that lasts all year—no store-bought substitutes needed. The secret lies in balancing sweetness with warm cinnamon and a touch of lemon, creating a texture that's velvety yet stable for canning.
I developed this method after years of testing, ensuring each batch achieves that perfect balance of flavor and shelf life.
The process begins with peeling and cooking apples until tender, then blending them into a silky puree. A simmer with sugar and spices infuses every jar with autumnal warmth, while lemon juice acts as a natural preservative.
Sterilized jars and proper sealing extend freshness for months, making this ideal for gifts or pantry staples.
What you'll end up with is a rich, aromatic sauce that pairs beautifully with pork, pancakes, or even toast. The spices deepen over time, rewarding patience with layers of flavor. This isn't just apple sauce—it's a homemade treasure that turns simple fruit into something extraordinary.
Perfect for meal prep or holiday gifting, this recipe yields about seven pints—enough to stock your shelves and share with neighbors. The key to success? Precision in cooking times and sterilization. Let's get started on your first batch today.
Ingredients for bottled apple sauce
Six pounds of apples and a handful of pantry staples. That's all you need for jars full of homemade goodness.
| Ingredient | Amount | Notes |
|---|---|---|
| Apples (Mixed Varieties) 🍎 | 6 lb | Peeling optional, cores removed |
| Granulated Sugar 🍚 | 3 cups | Adjust for tartness preference |
| Ground Cinnamon 🌿 | 2 tsp | Freshly ground preferred |
| Lemon Juice 🍋 | ¼ cup | Freshly squeezed, preserves color |
| Salt 🧂 | ½ tsp | Kosher or sea salt |
| Water 💧 | 1 cup | For simmering, adjust as needed |
| Pint-Sized Mason Jars 🥫 | 14 jars | With new lids and rings |
| Apple Cider Vinegar 🍶 | 1 tbsp | For sterilizing jars (optional) |
Apples are the star, so pick a mix of sweet and tart varieties—Honeycrisp and Granny Smith work perfectly. Local orchards or farmers markets often have deals in season, but the regular grocery store produce section works too. I always grab a few extra pounds—you can never have too much apple sauce. Look for firm, unblemished fruit; those bruised spots turn mushy. Peel if you prefer a smoother texture, or leave the skin on for extra fiber and nutrients. The cinnamon? Penzeys or bulk bins have the best quality, but the regular grocery store stuff is fine for this recipe.
No Granny Smith apples? Fuji or Gala add sweetness, but balance with a tart variety like Braeburn. Running low on sugar? Maple syrup or honey works at a 1:1 ratio, though it’ll darken the sauce. The lemon juice is non-negotiable—it keeps the color bright and acts as a natural preservative. Short on time? Pre-peeled apples from the salad bar save steps, though they’re pricier. For sterilizing jars, vinegar is optional but recommended—just add a teaspoon to each jar before filling. If you skip it, boil the jars for 10 minutes instead.
This sauce keeps beautifully—1 year unopened in a cool, dark pantry. Once opened, refrigerate and use within 2 weeks. The flavor actually improves over time, so don’t rush to finish it all. I always make a double batch—one for the pantry, one for gifting. Label your jars with the date and contents; trust me, you’ll forget what’s in there after a few months. Freezing is an option too, but canning is worth the effort for that restaurant-quality texture.
Why You'll Love This Recipe
- No-Cook Magic: I swear by this recipe when I’m too tired to peel apples or boil anything—just chop, mix, and bottle. The apples soften perfectly overnight, and the cinnamon-sugar blend does all the work for you.
- Sweet-Tart Balance: That lemon juice twist cuts through the sugar just enough to keep it bright, not cloying. Honestly, the first time I tasted it, I grabbed another jar before the first was even done.
- Year-Round Pantry Staple: I keep a few jars stocked for toast, oatmeal, or even as a glaze for pork chops—no more rushing to the store when I need a quick flavor boost. (Yes, even on a Tuesday night.)
- Budget-Friendly Luxury: Apples and spices are cheap, and this recipe stretches them into something that feels fancy. I’ve made it last weeks in my fridge, and the cost per serving is laughably low compared to store-bought.
Step-by-step instructions for homemade apple sauce
Here's how to turn fresh apples into spiced preserves that'll last all year.
Prepare the Apples for Cooking
Start by washing the 6 lb of mixed apples thoroughly under cold water. I like to work with a mix of sweet and tart varieties—think Honeycrisp and Granny Smith—for that perfect balance of flavors. Peel the apples if you prefer a smoother texture, or leave the skins on for extra fiber and rustic appeal. Cut them into ¼-inch thick slices or small chunks, then remove the cores.
Place the prepared apples in a large, heavy-bottomed pot. Add the 1 cup of water and bring to a boil over medium-high heat. Once boiling, reduce the heat to medium-low and let the apples simmer uncovered for 10-15 minutes until they begin to soften. You'll know they're ready when a knife slides in easily—this step prevents a watery sauce later.
Sweeten and Spice the Mixture
While the apples cook, combine the 3 cups of granulated sugar, 2 teaspoons of ground cinnamon, and ½ teaspoon of salt in a small bowl. Once the apples have softened, give them a quick stir with a wooden spoon to break them down slightly. Then add the sugar mixture and the ¼ cup of lemon juice to the pot.
Stir everything together until the sugar dissolves completely. I like to press the apples against the sides of the pot with a wooden spoon to release any trapped juices. This ensures every spoonful gets that perfect balance of sweetness and spice. Let the mixture simmer uncovered for another 15-20 minutes until it thickens to your desired consistency—it should coat the back of a spoon but still be spreadable.
Sterilize and Fill the Mason Jars
While the apple sauce simmers, prepare your 14 pint-sized Mason jars. Wash them in hot, soapy water, then rinse thoroughly. For extra safety, you can sterilize them by boiling in water for 10 minutes or running them through a dishwasher cycle. Keep the jars warm until ready to use.
If you're using the optional 1 tablespoon of apple cider vinegar, add it to the hot apple sauce just before filling the jars. This helps preserve the color and prevents mold growth. Using a ladle or funnel, carefully fill each jar with the apple sauce, leaving about ½-inch of headspace at the top. Wipe the rims with a clean, damp cloth to remove any residue that could prevent sealing.
Seal and Process the Jars
Place a new lid on each jar and screw on the ring until it's fingertip-tight—don't overtighten, or you might crack the jar. Set the jars on a clean towel on your countertop and let them sit for 10 minutes. This allows any air bubbles to rise to the surface. Use a bubble tool or clean chopstick to gently press down on the apples and pop any bubbles.
Once the bubbles are gone, tighten the rings just a bit more. For shelf stability, process the jars in a water bath canner. Fill the canner with water and bring it to a boil. Place the jars in the canner using a jar lifter, ensuring they're covered by at least 1 inch of water. Process the pint jars for 15 minutes at a gentle boil. After processing, remove the jars and let them cool undisturbed for 12-24 hours. Check the seals—if the lids are concave and don't pop when pressed, your apple sauce is ready for storage.
Pro Tips For Making Bottled Apple Sauce
- Peel Apples After Cooking: Raw apple peels stay stubbornly tough—no matter how long you simmer. Instead, cook the whole fruit (peels and all) until fork-tender, then peel while still warm. The texture breaks down, and you’ll save 10 minutes of pre-peeling frustration. (Yes, even the red-skinned ones soften surprisingly well.)
- Use Tart Apples Only: Honeycrisp or Fuji? Skip them. For bottled sauce, stick to Granny Smith or Braeburn—their sharp acidity balances sugar and keeps the sauce from tasting cloying. Mixed varieties? Toss in a handful of tart crabapples if you’re desperate; they’re the unsung heroes of shelf-stable flavor.
- Simmer Low and Long: High heat turns apple sauce into mush. After the initial boil, drop the heat to a bare simmer and let it cook uncovered for 45–60 minutes. This evaporates excess water, thickens the sauce naturally, and prevents that sad, watery consistency in jars. (Your future self will notice the difference.)
- Salt the Sugar First: Dissolve your sugar in the cooking liquid with a pinch of salt—about ¼ teaspoon per cup—before adding the apples. This distributes flavor evenly and cuts down on the gritty residue that clings to the bottom of jars. (I learned this the hard way after opening a jar that tasted like sugar had settled like snow.)
Essential equipment for bottled apple sauce
Heavy-Bottomed Pot
Your 6-quart Dutch oven or enamel-coated pot (like All-Clad or Le Creuset) is non-negotiable for even cooking. Thin pots create hot spots that burn the apples unevenly. I use my 5.5-quart Lodge Dutch oven—it’s affordable, durable, and handles the 10-15 minutes of simmering like a champ.
Avoid nonstick; apples stick to it and release unwanted flavors. 🔥
Immersion Blender
For ultra-smooth sauce, skip the food mill and use an immersion blender (like the Ninja BN601 or Hamilton Beach 58341) directly in the pot. This eliminates transfer steps and keeps heat stable.
If you prefer chunky texture, a potato masher works too—just press gently to avoid breaking the apples into mush.
Water Bath Canner
A 7-quart water bath canner (like Ball or Bernardin) is essential for safe, long-term storage. It maintains a steady 212°F boil to seal jars properly. If you don’t own one, a large stockpot with a rack works, but ensure jars are fully submerged.
Never use a slow cooker—it can’t reach the required temperature. ⚡
Jar Funnel & Bubble Tool
Fill jars cleanly with a stainless steel funnel (like the Ball 800005) to prevent spills and splatters. A bubble tool (or clean chopstick) removes air pockets that cause seals to fail. I keep mine in a magnetic jar rack on my pantry wall for easy access during canning days.
Digital Thermometer
Monitor the sauce’s thickness with a candy or instant-read thermometer (like the Thermapen One). It should reach 220°F—the point where it coats a spoon but isn’t gluey. Without one, taste-test carefully: the sauce should thicken noticeably after 15-20 minutes of simmering.
Nutrition facts
Frequently asked questions
Can I use frozen apples instead of fresh?
Yes! Frozen apples work perfectly—just thaw them first by soaking in cold water for 1-2 hours or microwaving in 30-second bursts. Drain well before cooking to avoid a watery sauce. The texture will be slightly softer, but the flavor stays rich. Avoid pre-cooked frozen apples (like those for baking) as they may be too mushy.
How do I adjust the sweetness for tart apples?
If your apples are extra tart, increase the sugar to 3.5 cups or add 1-2 tablespoons of honey during the final simmer. For a lower-sugar option, reduce to 2.5 cups and boost the lemon juice to ⅓ cup to balance acidity. Taste-test after 10 minutes of simmering to adjust.
Why did my apple sauce turn out watery?
Watery sauce usually means the apples weren't cooked long enough or too much liquid was added. Next time, simmer uncovered for 20-25 minutes until it thickens to 220°F. If it's still thin, return the jars to the water bath for 5 extra minutes—the heat will evaporate excess moisture. Pro tip: Use a slotted spoon to remove skins before blending for smoother results.
Can I add other spices besides cinnamon?
Try ½ teaspoon of nutmeg, ¼ teaspoon of cloves, or a pinch of cardamom for warmth. For warmth with a kick, add ¼ teaspoon of cayenne or ½ teaspoon of ginger. Just reduce the cinnamon to 1 teaspoon to balance flavors. Always taste before canning—spices deepen during storage!
How long will homemade apple sauce last?
Properly canned apple sauce stays fresh for 1 year in a cool, dark pantry. Once opened, refrigerate and use within 2 weeks. For longer shelf life, freeze in airtight containers for up to 6 months. The flavor actually improves over time, so don’t rush to finish it! Label jars with the date to track freshness.