
Main Courses
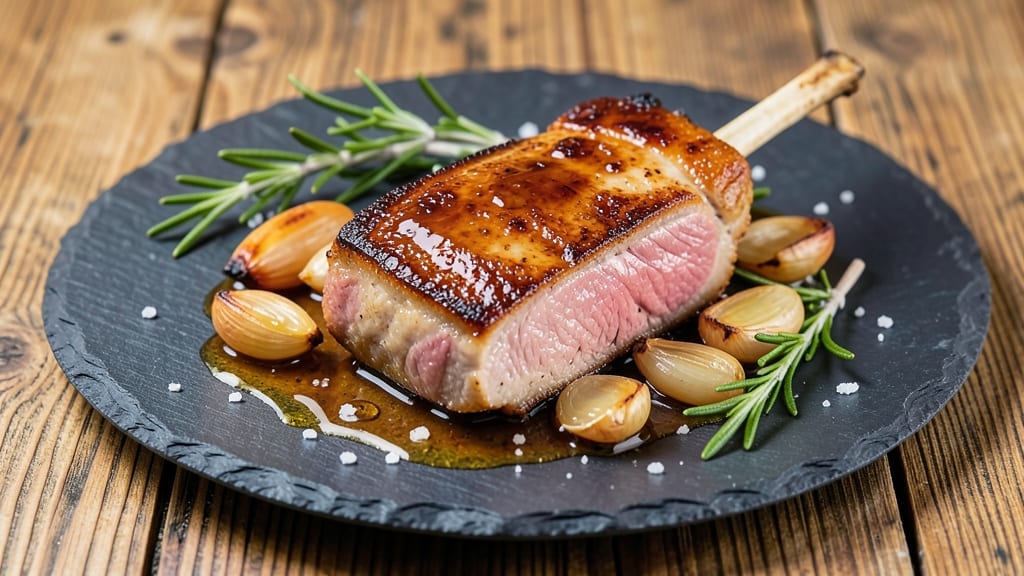
This pork chop recipe with apple cider vinegar transforms ordinary cuts into restaurant-worthy meals with just a few simple ingredients. 🌟 After years of perfecting the balance between tender meat and bright, tangy flavors, I’ve cracked the code—no fancy techniques required.
The vinegar works its magic by tenderizing the meat while adding a subtle depth that cuts through the richness.
The secret lies in a quick 15-minute marinade that does all the heavy lifting. Apple cider vinegar breaks down tough fibers, while olive oil and herbs infuse flavor into every bite. Pan-searing creates a crispy crust that seals in juices, ensuring each chop stays moist and flavorful.
This method works with bone-in or boneless cuts, making it versatile for weeknight dinners or special occasions.
By the time you’re done, you’ll have golden, caramelized pork chops with a tangy glaze that brightens every bite. The vinegar’s acidity also helps balance any richness, leaving you with a dish that’s bold yet refined.
Serve with roasted potatoes or a crisp green salad for a complete meal that feels indulgent without being complicated.
Leftovers reheat beautifully, and the marinade doubles as a flavorful drizzle for roasted vegetables or grilled fish. This recipe delivers professional results with minimal effort—perfect for home cooks who want restaurant-quality meals without the fuss. Let’s get cooking!
Ingredients for pork chop recipe apple cider vinegar
Few ingredients deliver restaurant-quality pork chops like this tangy, herb-infused marinade and pan-searing technique.
| Ingredient | Amount | Notes |
|---|---|---|
| Bone-In Pork Chops 🍖 | 4 whole | 1-inch thick, rib or loin cuts |
| Apple Cider Vinegar 🍏 | ¼ cup | Raw, unfiltered preferred |
| Extra-Virgin Olive Oil 🫒 | ½ cup | High-quality, fruity variety |
| Fresh Rosemary 🌿 | ¼ cup | Finely chopped, stems removed |
| Fresh Thyme 🌿 | 2 tbsps | Leaves only, finely chopped |
| Garlic Cloves 🧄 | 4 cloves | Minced, not pre-minced jarred |
| Diamond Crystal Kosher Salt 🧂 | 1 ½ tsp | For seasoning, not iodized |
| Freshly Ground Black Pepper 🌶️ | 1 tsp | Coarsely ground |
| Unsalted Butter 🧈 | 2 tbsp | Cold, cubed for searing |
| Brown Sugar 🍬 | 1 tbsp | Light or dark variety |
| Fresh Parsley 🌿 | ⅛ cup | Chopped, for garnish |
| All-Purpose Flour 🌾 | 2 tbsp | For dredging, if desired |
The bone-in pork chops are non-negotiable for maximum flavor and tenderness. Look for 1-inch thick cuts from the rib or loin section—Costco or Whole Foods typically carry the best quality. If you can't find bone-in, boneless chops work too, but pat them dry thoroughly before marinating. The apple cider vinegar should be raw and unfiltered—Bragg or Texas Pete are reliable brands. Fresh herbs are essential here; Williams Sonoma or your local farmers market offer the best quality rosemary and thyme. For the olive oil, California Olive Ranch or Olisal provide excellent fruity varieties that won't overpower the delicate flavors of the pork.
No apple cider vinegar? White wine vinegar or lemon juice work in a pinch, though the flavor profile will differ slightly. Running short on fresh rosemary? Dried rosemary at one-third the amount works, but toast it in a dry pan for 30 seconds first to deepen the flavor. Pre-minced garlic lacks freshness—smash whole cloves with the flat side of your knife for maximum flavor. Want extra crispiness? Lightly dredge the chops in all-purpose flour before searing. The brown sugar adds a subtle caramelization during the final resting phase—muscovado sugar for a more complex flavor if you're feeling adventurous. For a quicker version, skip the marinade entirely and just coat the chops with olive oil, salt, and pepper before searing.
Marinated chops keep covered in the fridge for up to 24 hours, though they're best used within 4-6 hours for optimal tenderness. The marinade itself can be stored separately for 1 week and reused on other proteins like chicken or fish. For make-ahead convenience, fully cook the chops and store them in an airtight container for 3-4 days. Reheat gently in a skillet with a splash of water to prevent drying. The cold butter cubes are crucial for that perfect crust—don't melt them beforehand, or you'll lose the sizzle. Leftover marinade makes a fantastic drizzle for roasted Brussels sprouts or grilled asparagus, so don't toss it!
Why You'll Love This Recipe
- One-Pan Magic: Between us, this recipe is that rare thing—minimal cleanup with maximum flavor. Toss the pork chops in olive oil, vinegar, and herbs, then let the oven do the work. No extra bowls, no fuss, just golden-brown chops that smell like a cozy kitchen.
- Tangy Crispy Perfection: That apple cider vinegar isn’t just for salad—it cuts through the richness of the pork, leaving you with a crispy edge and juicy center. Honestly, the first time I tried it, I nearly licked the pan. (Okay, maybe I did.)
- Weeknight to Weekend: Make it for Tuesday dinners or Sunday suppers—it’s that adaptable. Serve with roasted potatoes for a hearty meal or pair it with a simple salad for a lighter bite. My roommates don’t even care if it’s "fancy" because it’s always delicious.
- Budget-Friendly Leftovers: Bone-in chops stretch further than you’d think, and the vinegar marinade keeps them tender for days. I’ll be real: I’ve reheated these for lunch the next day, and no one’s complained. (Yet.) Plus, fresh rosemary and thyme make it feel special without breaking the bank.
Step-by-step instructions for pan-seared pork chops with apple cider glaze
Master this technique for restaurant-quality pork chops with crispy edges and a tangy-sweet glaze.
👨🍳 Step 1: Create the Apple Cider Vinegar Glaze
In a small saucepan, combine the 0.25 cup apple cider vinegar, 1 tbsp brown sugar, and 4 cloves minced garlic. Bring to a simmer over medium heat and reduce by half—about 5-7 minutes—until the mixture thickens slightly and develops a caramelized aroma. This reduction concentrates the vinegar's acidity and sweetness, creating the glaze's signature depth.
Strain the mixture through a fine-mesh sieve to remove any garlic bits, then set aside. The glaze should have a syrupy consistency—if it's too thin, simmer for another minute. Here's the thing: this step transforms ordinary vinegar into a flavorful sauce that balances the richness of the pork. Don't skip the reduction; it's what makes this recipe special.
🔥 Step 2: Season and Sear the Pork Chops
Pat the 4 whole bone-in pork chops completely dry with paper towels—this is critical for achieving crispy skin. In a small bowl, mix 1.5 tsp diamond crystal kosher salt, 1 tsp freshly ground black pepper, 0.25 cup finely chopped fresh rosemary, and 2 tbsps finely chopped fresh thyme. Press this herb mixture firmly onto both sides of each pork chop, ensuring even coverage.
Heat 0.5 cup extra-virgin olive oil in a large skillet over medium-high heat until it shimmers. Add the pork chops and sear for 4-5 minutes per side until the skin is deeply golden brown and crispy. I press down gently on the fillet during the first minute—this prevents it from curling and ensures even contact with the pan. The internal temperature should reach 140°F at this point.
🍳 Step 3: Finish with Butter and Glaze
Remove the pork chops from the skillet and set aside on a wire rack. Reduce the heat to medium and add the 2 tbsp cold cubed unsalted butter to the same skillet. Let it melt completely, then pour in the reduced apple cider glaze. Toss the skillet to combine, scraping up any browned bits from the bottom—these contain concentrated flavor.
Return the pork chops to the skillet and spoon the butter-glaze mixture generously over the top. Let them simmer for 1-2 minutes until the glaze caramelizes slightly and coats the pork. The butter adds richness while the glaze creates a glossy finish. If the glaze thickens too much, add 1-2 tablespoons of water to loosen it.
⏰ Step 4: Rest and Garnish
Transfer the pork chops to a cutting board and let them rest for 5-7 minutes. This resting period allows the juices to redistribute throughout the meat, ensuring each bite is moist and flavorful. While they rest, sprinkle 0.125 cup chopped fresh parsley over each chop for a pop of color and freshness.
Slice each pork chop against the grain for maximum tenderness, then serve immediately. The exterior should be crispy and golden, while the interior remains juicy with a subtle pink center. The apple cider glaze adds a perfect balance of tangy and sweet notes that complement the herbaceous seasoning.
Pro Tips For Making Pork Chop Recipe Apple Cider Vinegar
- SEAR FIRST, THEN BASTE: I used to add the vinegar too early, and the pork ended up soggy. Instead, sear the chops in olive oil over high heat until golden—about 3-4 minutes per side—then pour in the apple cider vinegar and let it bubble away. That crust locks in flavor and keeps the meat juicy.
- USE A SPLASH OF HONEY: The vinegar can taste sharp if not balanced. After deglazing, stir in 1 teaspoon of honey—just enough to mellow the acidity without overpowering the rosemary and thyme. It’s a tiny tweak that makes the sauce sing.
- LET THE CHOPS REST UNDER FOIL: Skipping this step means dry, stringy pork. Once the chops hit 145°F (use a meat thermometer), transfer them to a warm plate, tent loosely with foil, and let them sit for 5 minutes. The juices redistribute, and you’ll get that melt-in-your-mouth texture.
- SALT THE CHOPS 40 MINUTES EARLY: I learned this the hard way—salting pork chops right before cooking makes them release too much moisture. Instead, sprinkle them generously with salt and let them sit uncovered on a rack for 40 minutes. The seasoning penetrates deeper, and the crust forms better when you finally hit the pan.
Storing and reheating this recipe
Refrigerator Storage
Store cooked pork chops in an airtight container with the glaze for up to 4 days in the fridge. I wrap them tightly in parchment paper first to preserve moisture, then transfer to a glass container.
The apple cider glaze actually enhances flavor overnight, so leftovers often taste even better reheated. 💪
Freezer Prep Tips
For longer storage, freeze cooked chops in a single layer on a tray before transferring to a freezer bag. This prevents sticking. Label with the date—these keep well for 3 months.
When reheating from frozen, add 1 extra minute to your stovetop time to ensure they reach 165°F safely. I always thaw overnight in the fridge for best results.
Stovetop Reheating
My preferred method is reheating in a skillet over medium-low heat with 1 tablespoon water or apple cider vinegar to prevent drying. Cook for 3-4 minutes per side until heated through.
The vinegar helps maintain that signature tang. For extra crispiness, add ½ tablespoon butter during reheating and cover briefly with a lid.
Oven Refresh Method
Preheat oven to 350°F and place chops on a wire rack over a baking sheet. Drizzle with 1 teaspoon apple cider vinegar and ½ teaspoon olive oil, then cover loosely with foil.
Bake for 10-12 minutes until warmed through. This method keeps the texture tender while reheating evenly. Perfect for batch cooking!
Microwave Safety
If you're short on time, use the microwave on 50% power for 1-2 minutes covered with a damp paper towel. Stir halfway through to distribute heat.
Add 1 teaspoon water if the glaze appears dry. Microwaving works in a pinch, but I always reserve it for single servings to maintain quality.
Glaze Preservation
Save any leftover glaze in a small jar in the fridge for up to 1 week. It makes an amazing drizzle for roasted vegetables or grilled fish. If it thickens, thin with 1 teaspoon water before using. I've even used it as a marinade for chicken thighs—works beautifully! 🌟
Nutrition facts
Frequently asked questions
Why does apple cider vinegar make pork chops more tender?
The acid in apple cider vinegar breaks down tough muscle fibers through a process called mechanical tenderization. When marinated for even 15 minutes, it creates microscopic tears in the meat proteins, allowing them to absorb more flavor while becoming more tender. The vinegar also helps retain moisture during cooking, preventing dryness even when seared at high heat.
Can I use boneless pork chops with this recipe?
Boneless chops work perfectly—just reduce cooking time to 3-4 minutes per side (they cook faster without the bone's insulating effect). For extra crispiness, lightly dredge them in 2 tablespoons flour before searing. The apple cider glaze still adds that signature tang, though bone-in cuts develop slightly more depth of flavor from their natural juices.
What if I don't have fresh rosemary or thyme?
No problem! Use 1 teaspoon dried rosemary (toasted for 30 seconds in a dry pan) and 1 teaspoon dried thyme—just reduce amounts by 1/3. For a different flavor profile, swap in 1 tablespoon lemon zest or 1 teaspoon smoked paprika. The key is balancing the pork's richness with aromatic elements; herbs just amplify that effect.
How do I fix pork chops that come out dry?
Dry chops usually mean overcooking or skipping the rest. First, always use a meat thermometer—pork chops should reach 140°F internally before resting. If they're tough, slice against the grain and serve with extra glaze (the vinegar helps mask dryness). For next time, try brining the chops in ¼ cup salt per 4 cups water for 30 minutes before cooking to improve moisture retention.
Can I grill these pork chops instead of pan-searing?
Yes! Grilling works beautifully—just marinate the chops as directed, then grill over medium-high heat for 4-5 minutes per side (bone-in) or 3-4 minutes per side (boneless). For extra flavor, baste with the reduced apple cider glaze every 2 minutes. The vinegar's acidity prevents sticking on the grill grates, and the open flame adds a smoky depth that pairs perfectly with the tangy finish.