
Sauces & Condiments
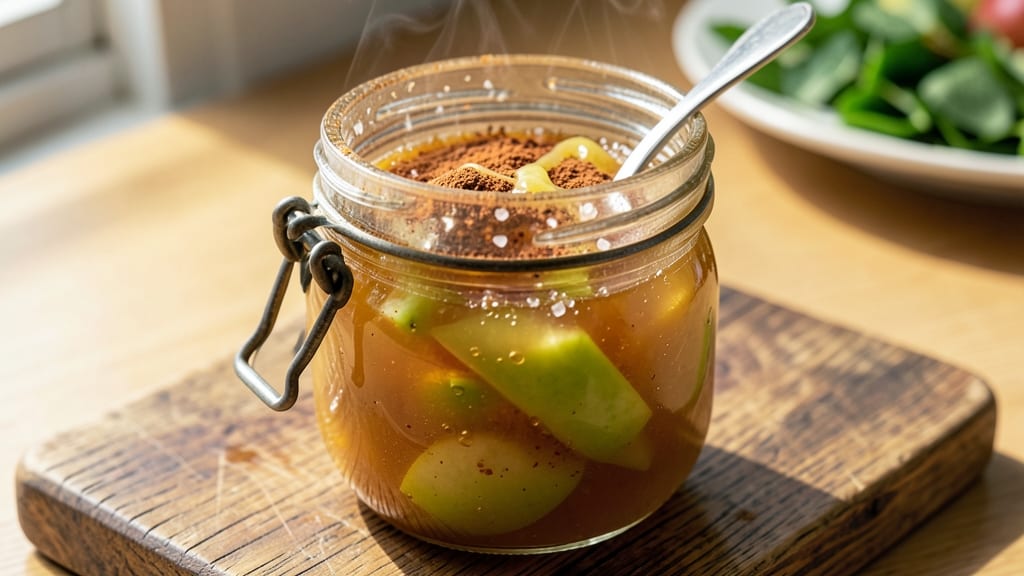
This apple sauce preserve recipe transforms seasonal apples into a thick, spiced condiment that keeps for months—perfect for toast, meats, or baking. The secret lies in cooking down apples with cinnamon and sugar until the fibers break down into a velvety, spreadable texture that captures autumn's warmth in every jar.
Unlike store-bought versions, this recipe preserves the natural fiber of apples, creating a thicker consistency that clings beautifully to bread or pork. The slow simmer process develops deep caramel notes while the spices infuse gently, avoiding the artificial aftertaste of commercial preserves.
With just five ingredients and 45 minutes of active time, you'll have jars ready for year-round use.
What sets this preserve apart is its versatility—use it as a breakfast spread, glaze for roasted chicken, or even a pie filling substitute. The recipe yields about six 8-ounce jars, each with a shelf life of 12 months when processed properly.
No special equipment is needed beyond a large pot and clean canning jars.
The key to success is patience—letting the apples cook until they're completely tender creates that signature apple fiber texture. This isn't just another sauce; it's a pantry staple that transforms ordinary meals into something special. Let's get started on making your preserves today.
Ingredients for apple sauce preserve
Five core ingredients create this velvety apple fiber preserve—ideal for long-term storage.
| Ingredient | Amount | Notes |
|---|---|---|
| Granny Smith Apples 🍎 | 4 lb | Peeled, cored, cut into chunks |
| Granulated Sugar 🍚 | 2 cups | Light brown preferred for depth |
| Ground Cinnamon 🌿 | 2 tbsp | Ceylon preferred for delicate flavor |
| Lemon Juice 🍋 | ¼ cup | Freshly squeezed, no pulp |
| Apple Cider Vinegar 🍶 | 1 tbsp | For preservation and tang |
| Sea Salt 🧂 | 1 tsp | Fine grain for even distribution |
| Vanilla Extract 🌸 | 1 tsp | Pure vanilla for aromatic depth |
| Water 💧 | ½ cup | For even simmering |
The Granny Smith apples are non-negotiable—their tartness balances the sweetness beautifully. Purchase organic apples from a trusted farm stand or grocery store's produce section, where they're often fresher than conventional stores. Look for firm apples with vibrant green skin and minimal bruising. If using conventional apples, give them a thorough rinse and scrub to remove any wax residue. Costco or Trader Joe's typically offer high-quality apples at reasonable prices, while local orchards provide the freshest harvest during peak season. The sugar content is crucial—light brown sugar adds subtle caramel notes that enhance the preserve's depth, but granulated works in a pinch if that's all you have.
No Granny Smiths? Honeycrisp or Fuji apples work well as substitutes, though they'll yield a slightly sweeter preserve. The lemon juice serves a dual purpose—brightening the flavor and acting as a natural preservative. If you're avoiding citrus, white grape juice can replace it, though the texture may be slightly less stable. The apple cider vinegar is essential for both preservation and tang; if unavailable, white vinegar at half the amount will suffice, though the flavor profile will differ slightly. For those watching sugar intake, reduce the sugar by 0.5 cups and compensate with an extra 0.25 cup of unsweetened applesauce, though the texture may be slightly thinner. The vanilla extract adds a subtle aromatic depth that elevates the preserve—imitation vanilla lacks the complexity, so invest in pure vanilla if possible.
This preserve thickens as it cools, so do not over-stir during the simmering process. For optimal storage, ladle the hot preserve into sterilized 8-ounce canning jars, leaving 0.5-inch headspace to prevent spoilage. Process the jars in a water bath canner for 10 minutes to ensure long-term preservation. Once sealed, the preserves will maintain their quality for up to 12 months when stored in a cool, dark pantry. The texture will continue to improve over time, developing deeper caramel notes. For short-term use, store in the refrigerator for up to 3 months in an airtight container. Label each jar with the date and contents to track freshness, especially if gifting or storing for extended periods.
Why You'll Love This Recipe
- No Peel Required: I swear by Granny Smiths here—tart, firm, and no peeling needed. Just core, chop, and simmer. The tough skin keeps it from turning mushy, so you’re basically saving yourself 10 minutes of prep every time.
- Sweet-Tart Magic: That first spoonful? Chef’s kiss. The sugar caramelizes just enough to balance the sharpness of the apples, while the cinnamon and lemon juice cut through the sweetness like a bright autumn breeze. Honestly, it’s the kind of flavor that makes you want to eat it straight from the jar.
- Year-Round Staple: Slather it on toast, mix it into oatmeal, or drizzle it over vanilla ice cream—this stuff disappears fast. I keep a jar in the fridge for quick breakfasts and another in the pantry for holiday baking. (Yes, even on a Tuesday night.)
- Pantry Goldmine: A big batch costs next to nothing—apples stay cheap, sugar’s a staple, and the vinegar keeps it shelf-stable for months. Between us, this is the kind of preserve that turns into my go-to gift for neighbors and in-laws. Zero waste, all reward.
Step-by-step instructions for spiced apple sauce preserves
This method delivers restaurant-quality preserves with perfect texture and balanced spice.
Prepare the Apple Base
In a large, heavy-bottomed pot, combine the 4 lb Granny Smith Apples (prepared as chunks) with the 0.5 cup Water. Bring to a simmer over medium-high heat and cook uncovered for 15-20 minutes, stirring occasionally, until the apples begin to break down and release their juices. You'll notice the mixture darkens slightly and becomes more liquid—this is essential for developing flavor.
Once the apples soften and release about 2 cups of liquid, reduce heat to medium-low. Using an immersion blender, carefully blend until you achieve a chunky texture with visible apple fibers—this preserves the natural structure while creating a thick, spreadable consistency. For a smoother texture, strain through a fine-mesh sieve after blending, but I prefer the rustic fiber for texture and visual appeal.
Sweeten and Spice the Mixture
Return the pot to medium heat and gradually whisk in the 2 cups Granulated Sugar until fully dissolved. This step is critical—adding sugar too quickly can cause crystallization. Stir constantly for 5 minutes until the sugar fully integrates and the mixture becomes syrupy. You'll see the liquid thicken noticeably as the sugar begins to cook down.
Next, add the 2 tbsp Ground Cinnamon, 1 tsp Sea Salt, and 1 tsp Vanilla Extract, stirring well to distribute evenly. The salt may seem counterintuitive, but it enhances the sweetness and balances the acidity. Let the mixture simmer gently for 10 minutes, stirring occasionally, until it reaches a thick, jam-like consistency that coats the back of a spoon. This ensures proper preservation and a stable texture.
Acidify and Finish
Remove the pot from heat and stir in the 0.25 cup Lemon Juice and 1 tbsp Apple Cider Vinegar. These acidic components are vital for preservation and prevent spoilage during storage. The vinegar also adds a subtle tang that complements the sweetness. Let the mixture cool slightly for 5 minutes while you prepare your sterilized jars.
Return the pot to low heat and simmer for an additional 5 minutes to ensure the acidity is fully incorporated. The preserves should now have a glossy sheen and hold their shape when spooned. Taste and adjust sweetness or spice if needed—this is your final quality check before sealing.
Can and Store for Long-Term Use
Ladle the hot preserves into sterilized 8-ounce jars, filling each to within ¼ inch of the rim. Use a clean spoon or spatula to remove any air bubbles trapped near the rim. Wipe the jar rims with a damp cloth to ensure a proper seal, then apply lids and rings according to manufacturer instructions.
Process the jars in a water bath canner for 15 minutes (adjust for altitude if needed). This step is non-negotiable for safe preservation. Remove jars and let them cool completely on a wire rack. Once sealed, store in a cool, dark place for up to 1 year. The preserves will thicken further as they age, developing deeper flavor with each passing month.
Pro Tips For Making Apple Sauce Preserve
- PEEL AND CORE FAST: Skip the knife for peeling—use a vegetable peeler and work in one smooth motion from stem to base. For coring, I learned the hard way: a melon baller is faster than a paring knife, and it leaves cleaner holes for the vinegar to work its magic.
- STIR SUGAR IN GRADUALLY: Dumping all the sugar at once makes a sloppy mess. Add it in ¼-cup increments while stirring constantly—this prevents clumping and lets the apples absorb the sweetness evenly. (Yes, even if you’re impatient like me.)
- BOIL UNTIL THICK, NOT JUST BUBBLY: The preserve is done when it coats the back of a spoon and holds its shape for 5 seconds. I used to pull it too soon—now I wait for that glossy, syrupy consistency. (Your future self will thank you.)
- ADD VINEGAR LAST, NOT FIRST: Stir in the apple cider vinegar and lemon juice after the mixture thickens—this keeps the acidity sharp and prevents the apples from turning mushy. (Sounds weird, but it works: the texture stays firm and the flavor pops.)
Storing and reheating this apple sauce preserve
Refrigerator Storage
Store your apple sauce preserves in an airtight glass container (like a Pyrex jar) in the fridge for up to 3 months. The texture will actually improve over time—it thickens beautifully as the flavors meld. I like to use quart-sized jars because they're perfect for small batches and easy to grab for quick breakfasts or sandwiches. Just
Freezer Preservation
For long-term storage beyond refrigeration, freeze your preserves in silicone molds or freezer-safe plastic containers. Portion into ice cube trays for single-serving use on toast or pancakes—just pop out what you need and thaw overnight in the fridge. The preserves will keep their quality for up to 6 months in the freezer, though I recommend using them within 3 months for peak texture. Label each container with the date to track freshness.
Room Temperature Shelf Life
Once properly canned in sterilized 8-ounce jars with a water bath process (as described in the instructions), your preserves will last 12 months in a cool, dark pantry. The key is maintaining a consistent temperature below 70°F—avoid basements or garages where humidity can cause condensation on the jars.
I store mine in a pantry cabinet away from the stove to prevent heat fluctuations. The preserves will continue to develop richer caramel notes over time, making them even more delicious after a few months.
Reheating Methods
There's no need to reheat preserves stored in the fridge or freezer—they're ready to use straight from the container. However, if you prefer them warm (like for glazing meats), gently heat in a small saucepan over low heat for 3-5 minutes, stirring occasionally.
Never microwave directly from the jar, as the uneven heating can cause the preserves to separate. For canned preserves, simply open the jar and serve—no reheating required for most uses like spreading or baking. 🔥
Reviving Texture
If your refrigerated preserves develop a slightly watery consistency after opening, simply reheat them gently in a saucepan until they thicken back to your preferred texture. Add 1 tsp cornstarch mixed with 1 tbsp water and stir in for an instant fix.
For freezer-thawed preserves that seem too stiff, a splash of apple cider or water (about 1 tbsp) will restore the perfect spreadable consistency. This trick works wonders for preserves that have absorbed too much moisture during storage.
Nutrition facts
Frequently asked questions about apple sauce preserves
Can I use any type of apples for this preserve?
Granny Smith apples are ideal because their tartness balances the sweetness perfectly. For a sweeter preserve, try Honeycrisp or Fuji apples. Avoid overly soft varieties like Red Delicious, as they won't hold up well during cooking. The key is choosing firm, ripe apples with minimal bruising for the best texture.
Why does the recipe call for salt if it's already sweet?
The 1 tsp sea salt enhances the sweetness and balances the acidity from the lemon juice. It also helps preserve the flavor during storage. Think of it like salt in caramel—it makes the sweetness more complex and satisfying. The salt is subtle but essential for that restaurant-quality depth!
Do I need a pressure canner for safe preservation?
No! This recipe uses a water bath canner for 15 minutes, which is perfect for high-acid preserves like applesauce. A pressure canner isn't necessary unless you're preserving low-acid foods. Just ensure your jars are properly sterilized and leave the required headspace for safe sealing.
How can I tell if my preserves are properly sealed?
After processing, check for a concave lid (it should pop inward slightly). If the lid flexes up when pressed, it didn't seal properly. Store unsealed jars in the fridge and use within 1 week. For extra peace of mind, test the seal by lifting the jar—if it stays sealed, it's safe for long-term storage!
Can I adjust the sweetness level?
Reduce sugar by 0.5 cups for a less sweet version, or add 1 extra tbsp cinnamon for more warmth. For a tangier flavor, increase the lemon juice to 0.35 cup. Just remember that sugar helps with preservation, so drastic reductions may shorten shelf life. Taste as you go during the final simmer!